
Windows patching is an unfortunate requirement for all Windows administrators. Patch Tuesdays keep coming with no end in sight. Many people use Windows Server Update Services (WSUS) to keep their Windows servers patched; it’s free and works for the most part. The problem is it’s yet another server you have to manage. It also usually depends on Active Directory and relies on GPOs to configure the servers to point to WSUS. Using AWS’s Systems Manager alleviates these and many other issues admins have with WSUS.
AWS Systems Manager or SSM is a free service provided by AWS allows you to manage AWS EC2 instances as well as on-premises nodes through a lightweight agent. For patching, it brings together both EC2 and on-premises nodes so you can keep everything patched in one console.
Creating a Patch Baseline
We’ll first create a patch baseline. The patch baseline allows you to set which kinds of patches get installed on your servers. Patch baselines allow you to set different criteria depending on the category, severity and so on of the various patches.
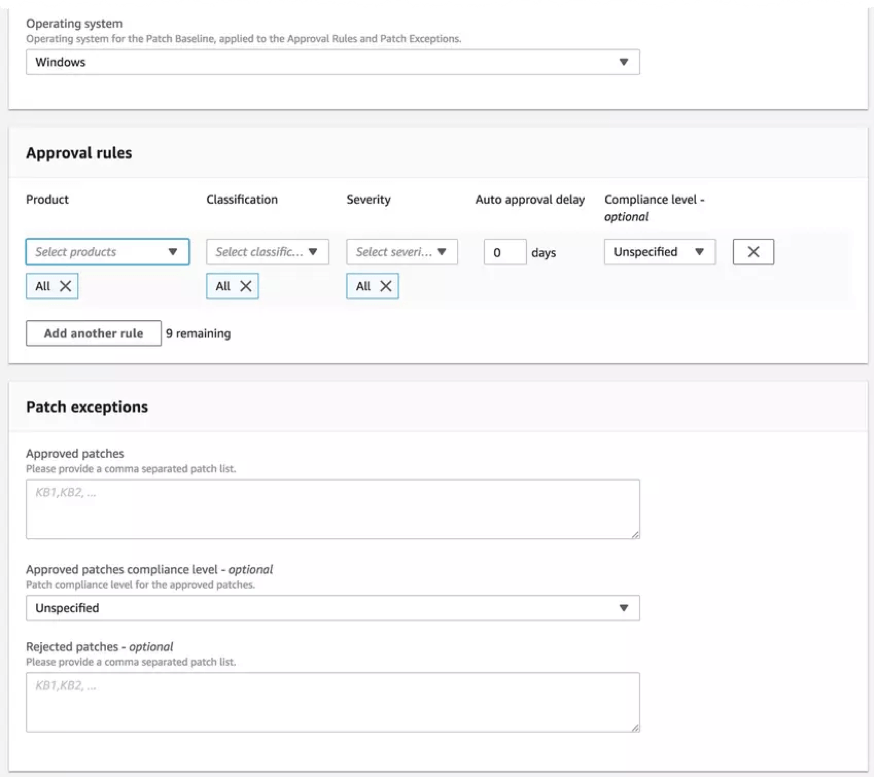
In this article, I’ll be creating a baseline that will only be for Windows servers that will only have critical updates with an auto-approval of two days. Let’s make this happen in PowerShell.
Unfortunately, the PowerShell code to do this isn’t exactly pretty but this is what I’m here for. Simply copy this out and run it! The code below creates our baseline with the name of Critical-Updates.
$autoApproveInDays = 7
$rule = New-Object Amazon.SimpleSystemsManagement.Model.PatchRule
$rule.ApproveAfterDays = $autoApproveInDays
$ruleFilters = New-Object Amazon.SimpleSystemsManagement.Model.PatchFilterGroup
$patchFilter
= New-Object Amazon.SimpleSystemsManagement.Model.PatchFilter
$severityFilter = New-Object Amazon.SimpleSystemsManagement.Model.PatchFilter
$severityFilter.Key = 'MSRC_SEVERITY'
$severityFilter.Values.Add('Critical')
$classificationFilter = New-Object Amazon.SimpleSystemsManagement.Model.PatchFilter
$classificationFilter.Key = 'CLASSIFICATION'
$classificationFilter.Values.Add( 'CriticalUpdates' )
$ruleFilters.PatchFilters.Add($severityFilter)
$ruleFilters.PatchFilters.Add($classificationFilter)
$rule.PatchFilterGroup = $ruleFilters
New-SSMPatchBaseline -Name 'Critical-Updates' -Description 'Baseline containing all critical update' -ApprovalRules_PatchRule $rule
Adding Managed Instances to Patch Groups
Next, we can add the instances to patch groups. Creating patch groups allows you to deliver different patches to different instances more easily. To use patch groups, we need to tag our instances. For this example, perhaps I have a server that’s in production so I’ll assign it to a patch group called Production.
I first need to get the managed instance ID, and I can then use that to assign the tag.
A maintenance window is required to install patches via SSM. To do that, we’ll need an IAM role to control access to the maintenance window. I’ll create one with PowerShell using the below JSON file which I’ll call C:.json.
PS> New-IAMRole -RoleName 'mw-task-role' -AssumeRolePolicyDocument (Get-Content -Raw C:\MaintenanceWindowRole.json)
Next, we need to create a maintenance window. I’ll use the New-SSMMaintenanceWindow command to do that. Below I’m creating a maintenance window that triggers every Tuesday at 4PM for four hours that cuts off any new tasks one hour before the maintenance window expires.
PS> New-SSMMaintenanceWindow -Name 'EveryTuesday' -Duration 4 -Cutoff 1 -Schedule 'cron(0 16 ? * TUE *)'
Registering the Patch Group with the Maintenance Window
PS> $target = @{Key="tag:Patch Group";Values=@("Production")}
Registering the Install Task with the Maintenance Window
Once we’ve got the patch group associated with the maintenance window, we can setup a task to scan for and install the necessary updates.
Register-SSMTaskWithMaintenanceWindow -WindowId $maintenanceWindowId -TaskArn 'AWS-ApplyPatchBaseline' -Target @{ Key="WindowTargetIds";Values=$windowTargetId } -TaskType "RUN_COMMAND" -TaskParameter $parameters -ServiceRoleArn $windowRoleArn -MaxConcurrency 1 -MaxError 1
Summary