If you find yourself suddenly having to deploy a lot of workstations at once, Windows Deployment Services (WDS) 2016 is here to help. WDS is a service by Microsoft that allows you to remotely deploy the Windows operating systems across tens, hundreds or even thousands of computers.
You could set up WDS using the boring GUI but if you need to spin up a WDS server in a hurry, PowerShell is your best bet.
In this article, you’re going to learn how to create a PowerShell script to perform all the needed tasks to get a WDS 2016 server up and running from scratch.
Before you get started, be sure you have a Windows Server 2016 or 2019 machine on hand to install and set up WDS on. Also, the demo will use a Windows 10 ISO so be sure you have one available if you’d like to replicate the demo’s results.
Installing the WDS Windows Feature
Let’s start by installing the Windows feature, WDS-Deployment, on the soon-to-be WDS server using the Install-WindowsFeature cmdlet. Be sure to include the management tools to get the WDS MMC and PowerShell module.
Install-WindowsFeature wds-deployment -includemanagementtools
When complete, you should see PowerShell return the following output. The command completed successfully, and a reboot is not required.

Initializing the WDS Server
Now that you have the WDS-Deployment Windows feature installed, you now have access to the wdsutil command-line utility. You’ll use this to initialize the server. To do so, specify where you would like your remote install to be. The
best practice is to use a separate partition. I am placing the command output in a variable because it can spew out some unhelpful warnings.
$wdsUtilResults = wdsutil /initialize-server /remInst:"E:\remInstall"
$wdsUtilResults | select -last 1
Just ensure that the last line says, The command completed successfully and you know your WDS server is up and running.
Adding the WDS Boot Image
Next, you need to add a boot image and at least one install image before we can really do anything with it, so import the boot.wim file.
Specify the path to a Windows 10 ISO mounted on our WDS server. This can take 30 seconds or so to import. We’re getting closer to setting up WDS PowerShell!
# Import the WinPE image from your install media
Import-WdsBootImage -Path "D:\sources\boot.wim"
Next, import the install image. This is the image that will actually be deployable after you’re done. You should create an image group to store it in. This can be named whatever you want, but you will want to logically group your images somehow.
I will call mine group desktops.

A WIM on an install media can have several images on it. We can use the Get-WindowsImage command to list the images.
Get-WindowsImage -imagePath "D:\sources\install.wim" | select Imagename
Then use the image name you want to import with the Import-WDSInstallImage command.
$imageName = 'Windows 10 Pro'
Import-WdsInstallImage -ImageGroup "desktops" -Path "D:\sources\install.wim" -ImageName $imageName
This import will take much longer because it’s a full operating system image.
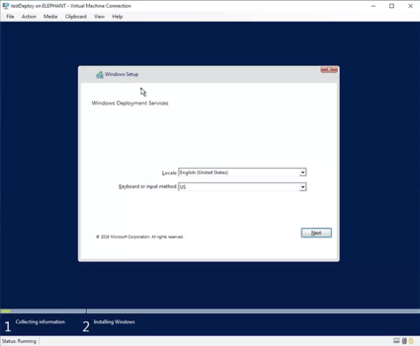
At this point, the WDS server is ready to test. You can either configure PXE boot or create and use a discovery image to test. I’ll boot to an image I already have made on our test machine.
After the discovery media boots, you can then begin setting up all options necessary to deploy Windows 10 to your remote machines.

Conclusion
WDS is a handy service to get Windows deployed on many computers at once. If you need a free remote-deployment tool that gets the job done, be sure to take WDS for a test run. While you’re at it, copy out the following PowerShell code shown in the demo to make it easy to get up and running quickly.
Install-WindowsFeature wds-deployment -includemanagementtools
$wdsUtilResults = wdsutil /initialize-server /remInst:"E:\remInstall"
# Import the WinPE image from your install media
Import-WdsBootImage -Path "D:\sources\boot.wim"
$imageName = 'Windows 10 Pro'
Import-WdsInstallImage -ImageGroup "desktops" -Path "D:\sources\install.wim" -ImageName $imageName
