When you finish adding your credentials to WhatsUp Gold, the next step to success is configuring the discovery process in WhatsUp Gold to work for you. WhatsUp Gold’s discovery process helps you to automate many different tasks. For example, you could modify the “Roles and Subroles” which determine which monitors and attributes are assigned to the device automatically, as well as many other settings you would otherwise have to configure manually after discovery.
Easy discovery steps
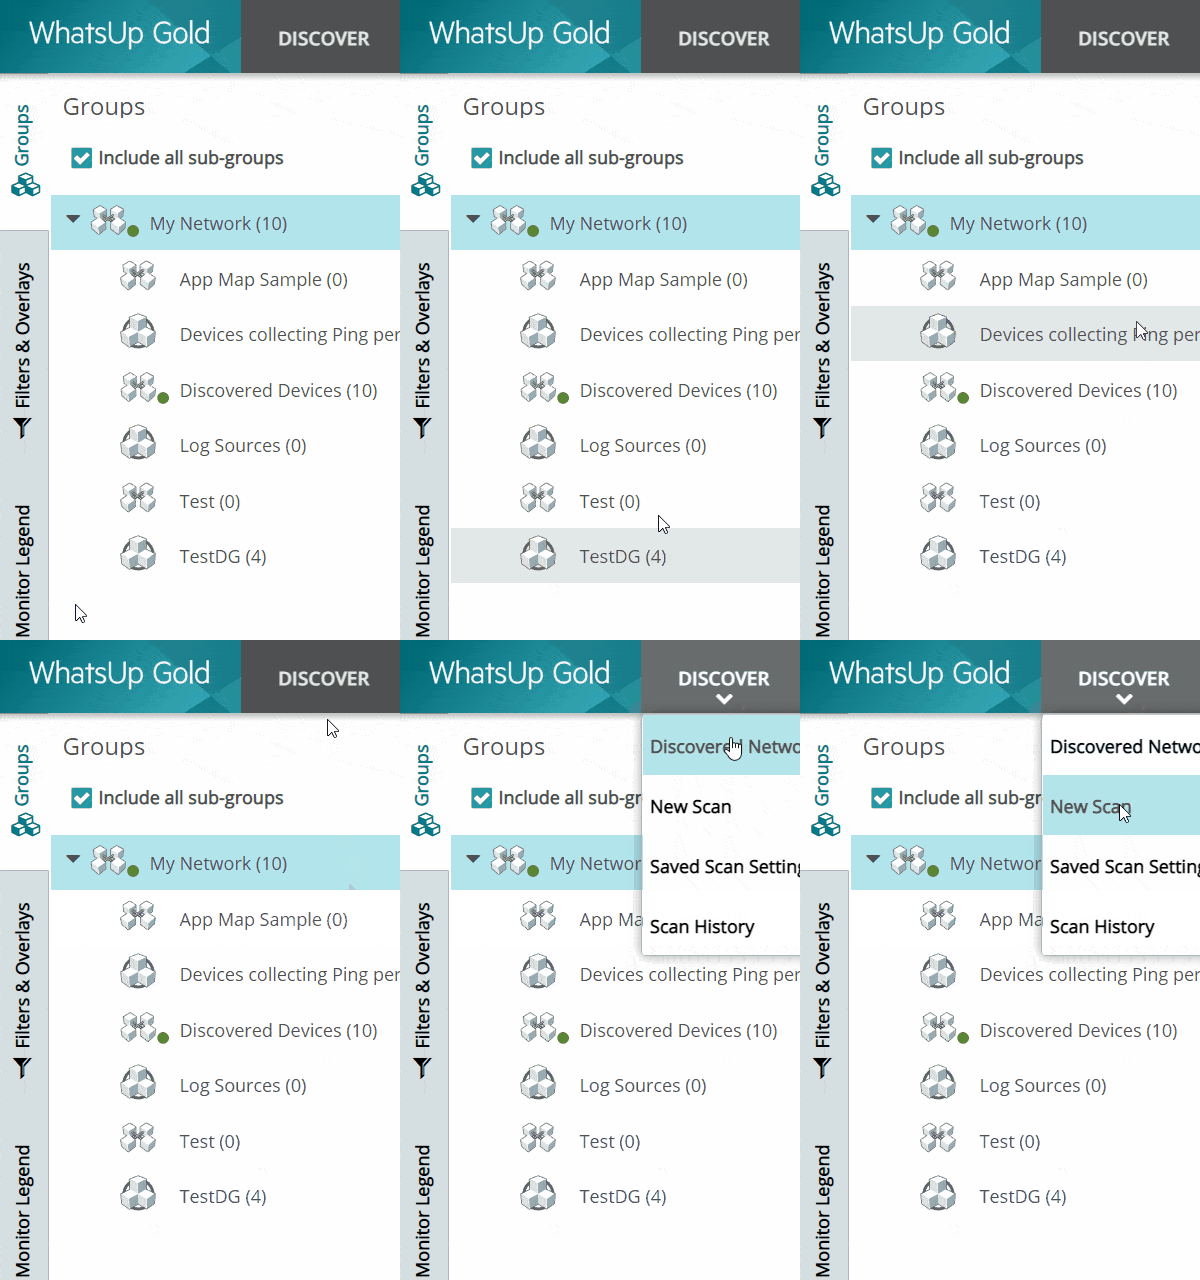
WhatsUp Gold makes figuring out what systems are active on your network simple. The first step to discovering your systems is to create a new scan profile and doing so is amazingly simple. The Discover button is the first item in the navigation menu, and click Discover and then click New Scan.
Scan profile
Start
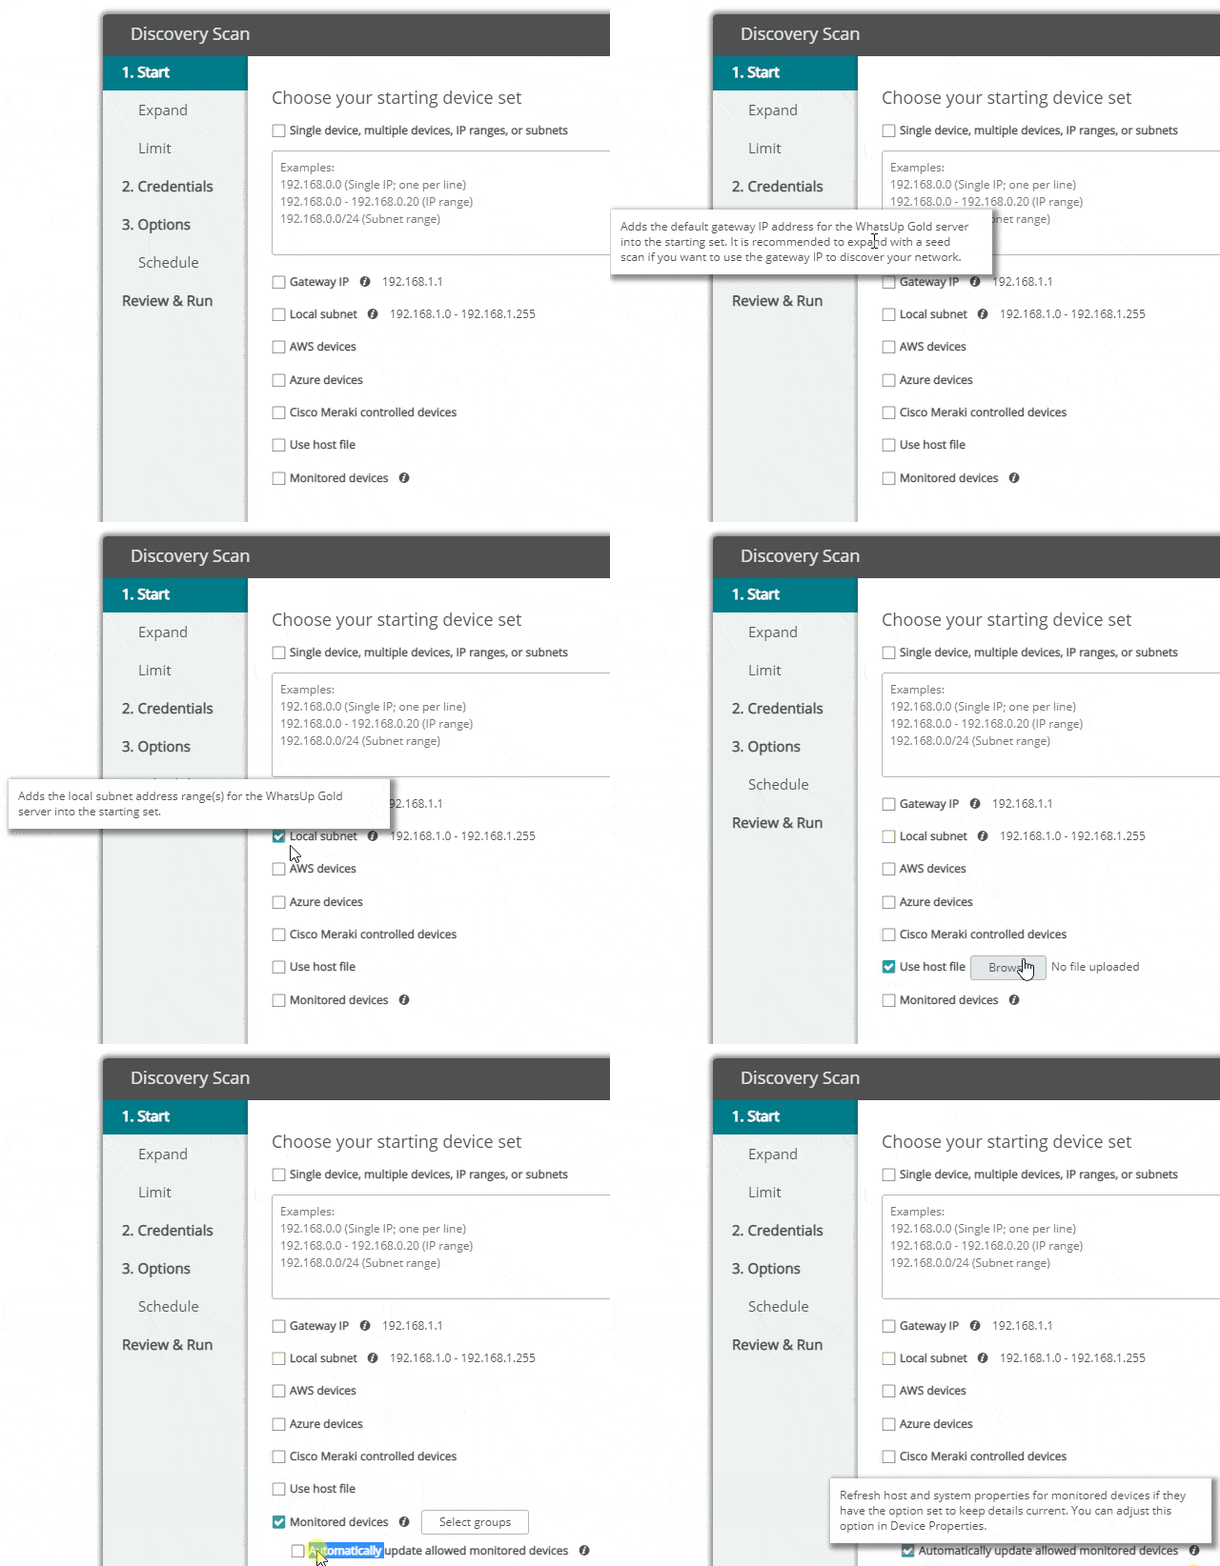
The first tab of the scan profile lets you specify what to scan. You’ll notice various checkboxes for distinct types of discovery. You could enable as many as you’d like, but it is best to limit the scope if you want your discovery to finish quickly. The options are self-explanatory, but if you want more detailed information, check out the documentation. Once you have filled in this information, you can click ‘Next’ in the top-right or jump directly to a specific tab by clicking any of the tabs on the left.
Start > Expand
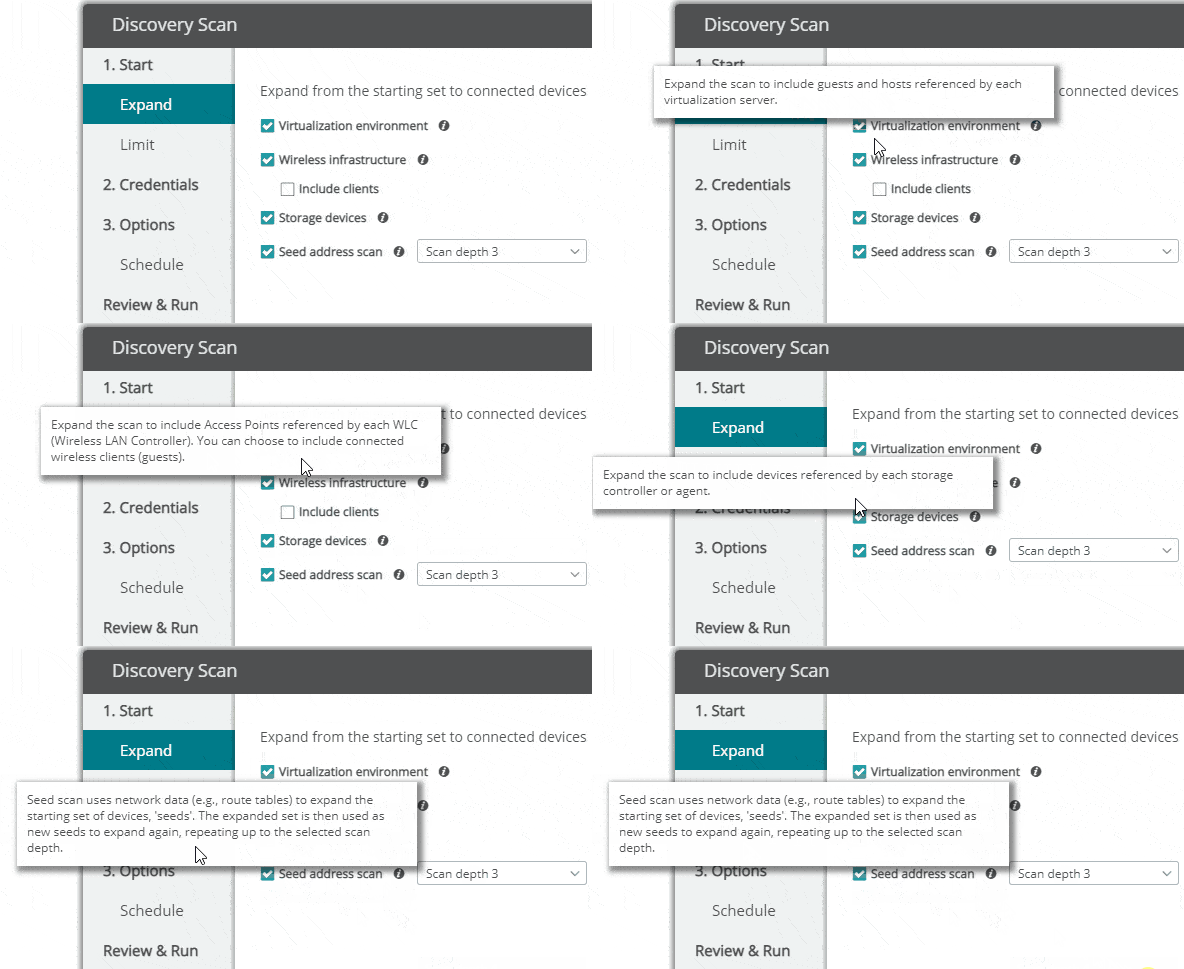
On the Expand tab, a few options for expanding your discovery beyond the IP address(es) you specified on the previous tab. When you start a discovery scan with the Virtualization Environment option selected, if the discovery process finds a VMware ESXi or vCenter, or a Hyper-V environment you have the proper credentials for, it will “expand” to these environments. The discovery will be able to discover systems hosted by those hypervisors regardless of if you specify their IP addresses on the first tab in some way. The Wireless Infrastructure includes any Access Points referenced by each Wireless LAN Controller (WLC) and an additional option to discover connected wireless clients.
Start > Limit
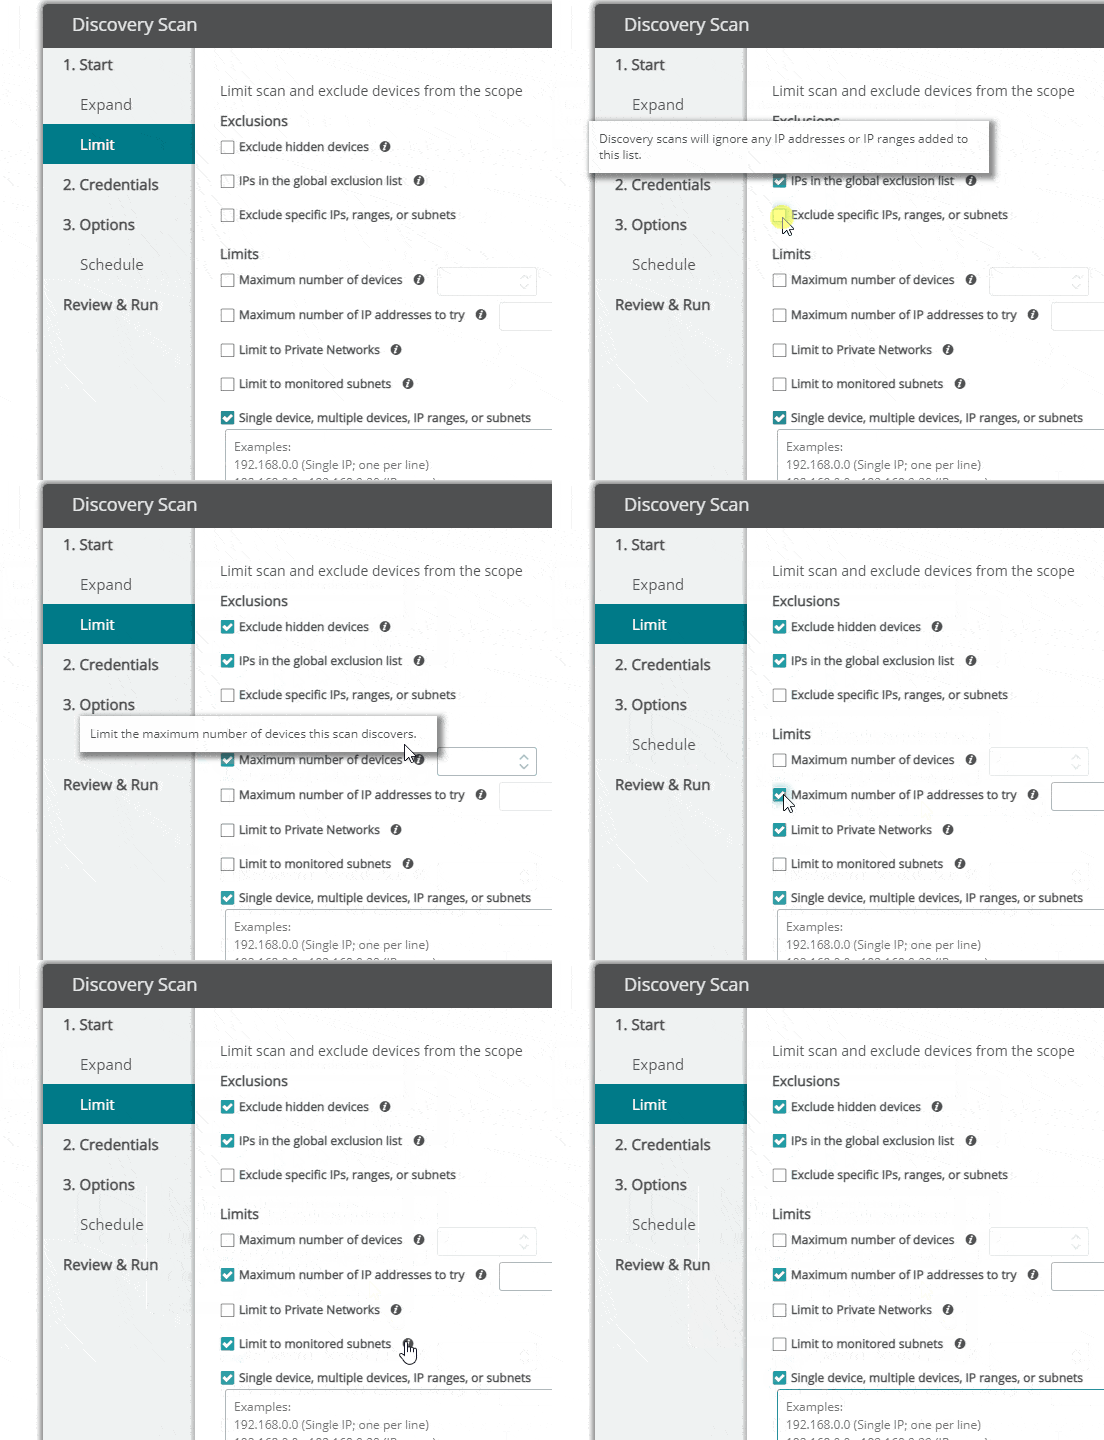
The Limit tab allows you to force the discovery to ignore specific IP addresses when necessary. For example, you could set the discovery profile to look at 10.1.1.0/16 but skip 10.1.1.50 and 10.1.2.0/24. I suggest using it to ensure your discoveries complete more quickly by always skipping systems you have no requirement to scan.
Credentials
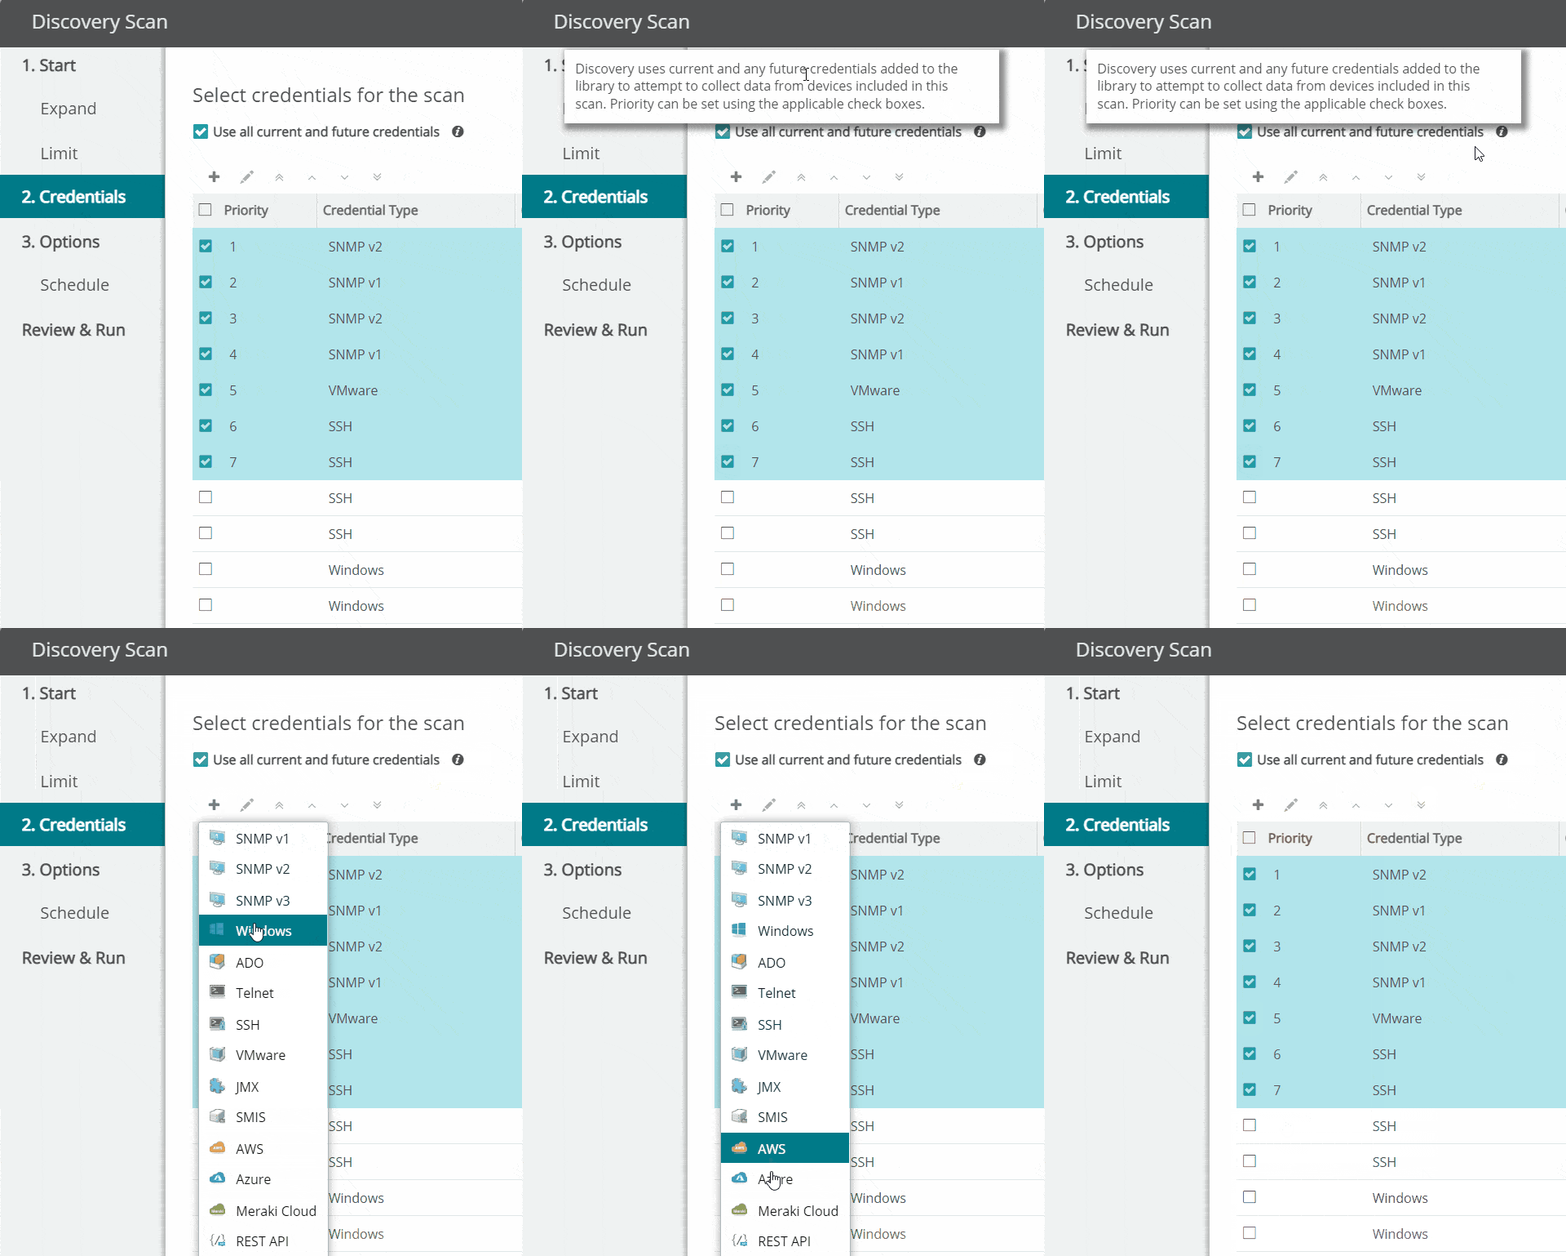
You specify which credentials to use during the scan on the Credentials tab, and I recommend keeping “Use all current and future credentials” checked. When using this option, the most important note is that each credential chosen will add to the time the discovery takes to complete.
For example, if I select multiple SNMP credentials and the first one fails, that failure adds to the total time to complete the discovery scan. To help combat this, you can prioritize your credentials. Select the most frequently used credentials on the network(s) you specified on the Start tab. Alternatively, you can uncheck “Use all current and future credentials” and select the checkbox next to each credential you’d like to use for that scan. In addition, you have the option to add new credentials to your Credential library from this tab.
Options
The Options tab allows you to set various advanced options for your discovery scan. This includes setting up email notification completion of discovery, default naming options, discovery scan methods, the maximum threads, and timeouts.
Options > Schedule
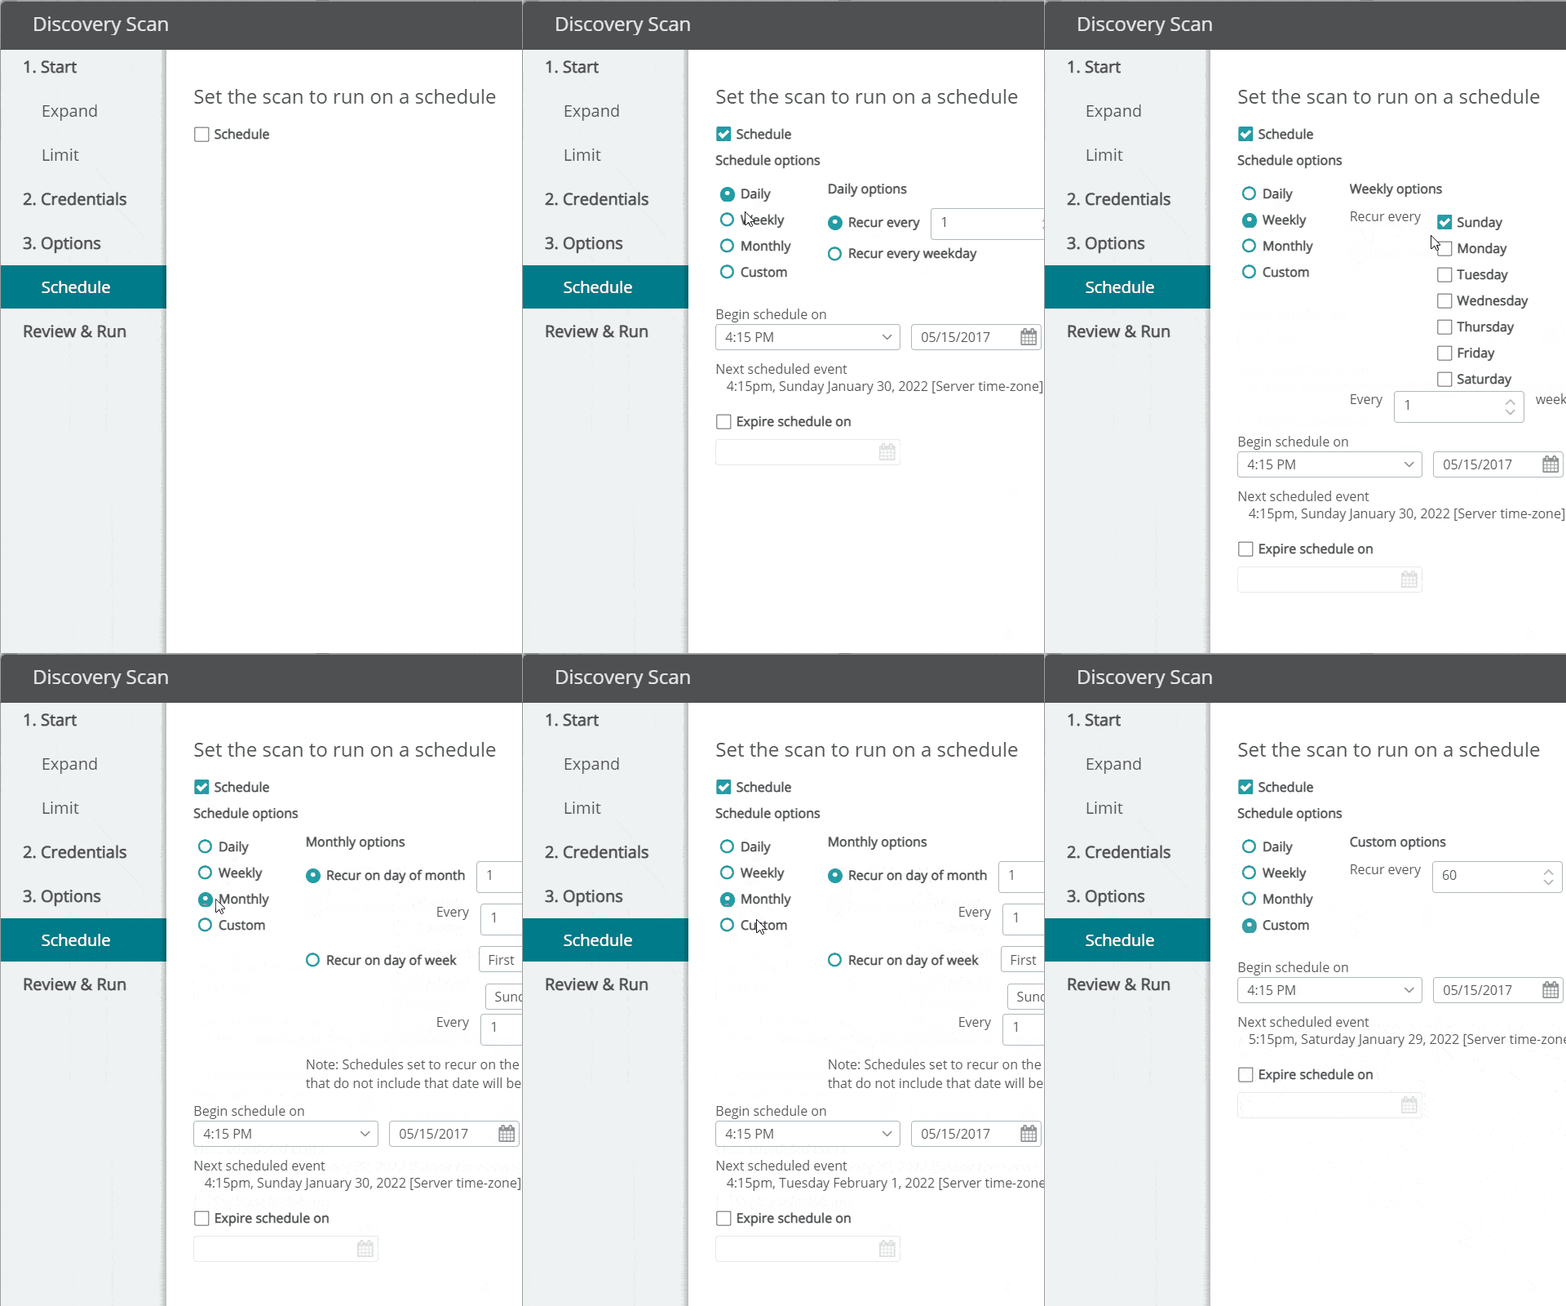
The Schedule tab in discovery lets you specify if you want this discovery to run on a specified schedule. There are many pre-canned and custom options available.
Review & Run
The Review & Run tab lets you review the options and settings you specified on the previous tabs. Once you confirm your settings, you can either save and run this discovery scan profile, just save it, or just run it. Note when the “Schedule” option is enabled, you must save the scan profile.
Scan profile tips
Remember, the more credentials used in the discovery, the longer your discovery will take. The email notification upon completion of discovery includes useful, detailed information to inform you of whether the scan requires action on your part. Although WhatsUp Gold allows you to run up to four discoveries at once, it is best to run only one at a time for various reasons. You can override the default naming convention with the names in a host file. The default timeout and retry values may be too aggressive for your environment or device. Consider adjusting them if you’re not getting the expected results.
